Connecting your iPad to a projector allows you to mirror or extend your iPad’s display so you can share videos, photos, presentations and more on a big screen. Whether you need to give a business presentation or want to play a movie for a group, connecting your iPad to a projector is easy to do in just a few steps.
Things You’ll Need
Before connecting your iPad, make sure you have the necessary equipment:
- An iPad. Any model that supports iOS 12 or later will work, including iPad Pro, iPad Air, iPad mini and standard iPad models.
- A projector and screen. Verify that your projector has an HDMI port or supports wireless streaming.
- The right cable or adapter to connect your iPad to the projector. This is commonly an HDMI or VGA cable or wireless adapter.
- The projector remote control.
Connecting with a Cable
Using a physical HDMI or VGA cable is the most reliable way to connect your iPad to a projector.
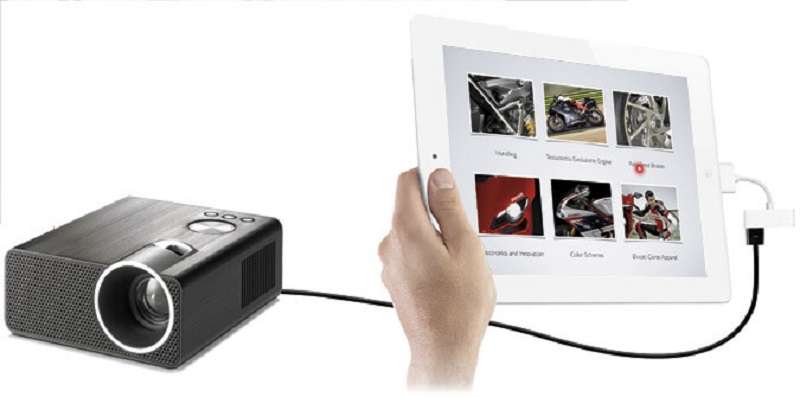
Steps for HDMI Connection:
- Connect one end of the HDMI cable to the HDMI port on your projector. Make sure the HDMI source is selected on the projector.
- Connect the other end of the cable to your iPad. For newer iPad models with a USB-C port, you’ll need a USB-C to HDMI adapter. For older models with a Lightning port, use a Lightning to HDMI adapter.
- Turn on your iPad and select the adapter as the video source from Control Center or Settings app. The iPad screen should now be mirrored on the projected display.
Steps for VGA Connection:
- Connect one end of the VGA cable to the VGA port on your projector. Make sure VGA source is selected.
- Attach the Lightning or USB-C to VGA adapter to your iPad.
- Connect the VGA cable to the adapter.
- Turn on your iPad and select the adapter as the video source. The iPad screen will be projected.
Connecting Wirelessly
You can also connect your iPad to the projector wirelessly using AirPlay, Chromecast or dedicated wireless adapters.
Using AirPlay:
- Connect the projector to the same Wi-Fi network as your iPad.
- Open Control Center on your iPad and select Screen Mirroring.
- Choose your projector from the list of available devices. Your iPad screen will now be wirelessly projected.
Using a Wireless Adapter:
- Plug the wireless adapter into your projector’s HDMI port. Connect it to power.
- Pair your iPad to the adapter over your Wi-Fi network. This may require an app or code depending on the adapter.
- On your iPad, choose the adapter as the video output in Settings or Control Center. Your iPad will now be wirelessly projected.
Using Chromecast:
- Connect the Chromecast device to your projector’s HDMI port and power it on.
- Make sure your iPad and Chromecast are on the same Wi-Fi network.
- Open a compatible app on your iPad and tap the Chromecast icon to select your projector as the output. Apps with Chromecast support include YouTube, Netflix, Hulu, Google Slides and many more.
Projecting Your iPad Screen
Once your iPad is connected to the projector, there are a few display options to consider:
- Mirror iPad display – This shows the exact same screen on your iPad and the projected display in real time. Good for presenting slides, webpages, videos and other apps.
- Extend iPad display – Your iPad screen shows different content than the projected display. For example, you can show slides on the projector while viewing presenter notes on your iPad.
- Project a single app – Wirelessly project just one iPad app instead of your full display. Useful for showing a video or presentation.
Most projector connection methods support mirroring. Extending requires an HDMI/VGA cable and adapter that specifically supports video out. Single app projection is only available wirelessly.
Helpful Projection Tips
- Position the projector so the image is centered and fits the screen. Projected images can be resized and focused using the projector controls.
- Dim the lights and close window shades to improve image visibility.
- Make sure your iPad volume is turned up if you’ll be playing videos or music. You can also connect external speakers to your projector if available.
- Use the iPad’s orientation lock to prevent the projected image from rotating when you turn your iPad.
- Exit distracting apps and disable notifications to avoid disruptions during your presentation.
- Keep your iPad charged or plugged in so the battery doesn’t die mid-presentation.
- Use a tripod stand to mount your iPad if you need both hands free.
- Connect to your projector and test your setup in advance to troubleshoot any issues.
Troubleshooting Common Projector Issues
If you’re having problems projecting your iPad display, try these troubleshooting tips:
- Make sure your adapter, cable and projector connections are secure. Loose connections can interrupt video output.
- Verify the projector input source matches your iPad connection type (HDMI, VGA, wireless).
- Reboot your iPad and projector and reconnect if the devices aren’t pairing correctly.
- Update your iPad software and projector firmware to the latest versions for compatibility.
- Check for interference if projecting wirelessly. Move closer to the wireless adapter/projector and away from other electronics.
- Use AirPlay or Chromecast settings on your iPad to select a different projector if multiple are available.
- Adjust your iPad and projector display resolution and aspect ratio if the image doesn’t fit right.
Following these tips for connecting your iPad to a projector with the right cables or adapters, adjusting your display settings, and troubleshooting issues will ensure your presentations shine every time.